The figures below are reproduced from Adapt, Survive and Flourish at full resolution.
They are provided to support close inspection of diagrams that were intentionally simplified in print.
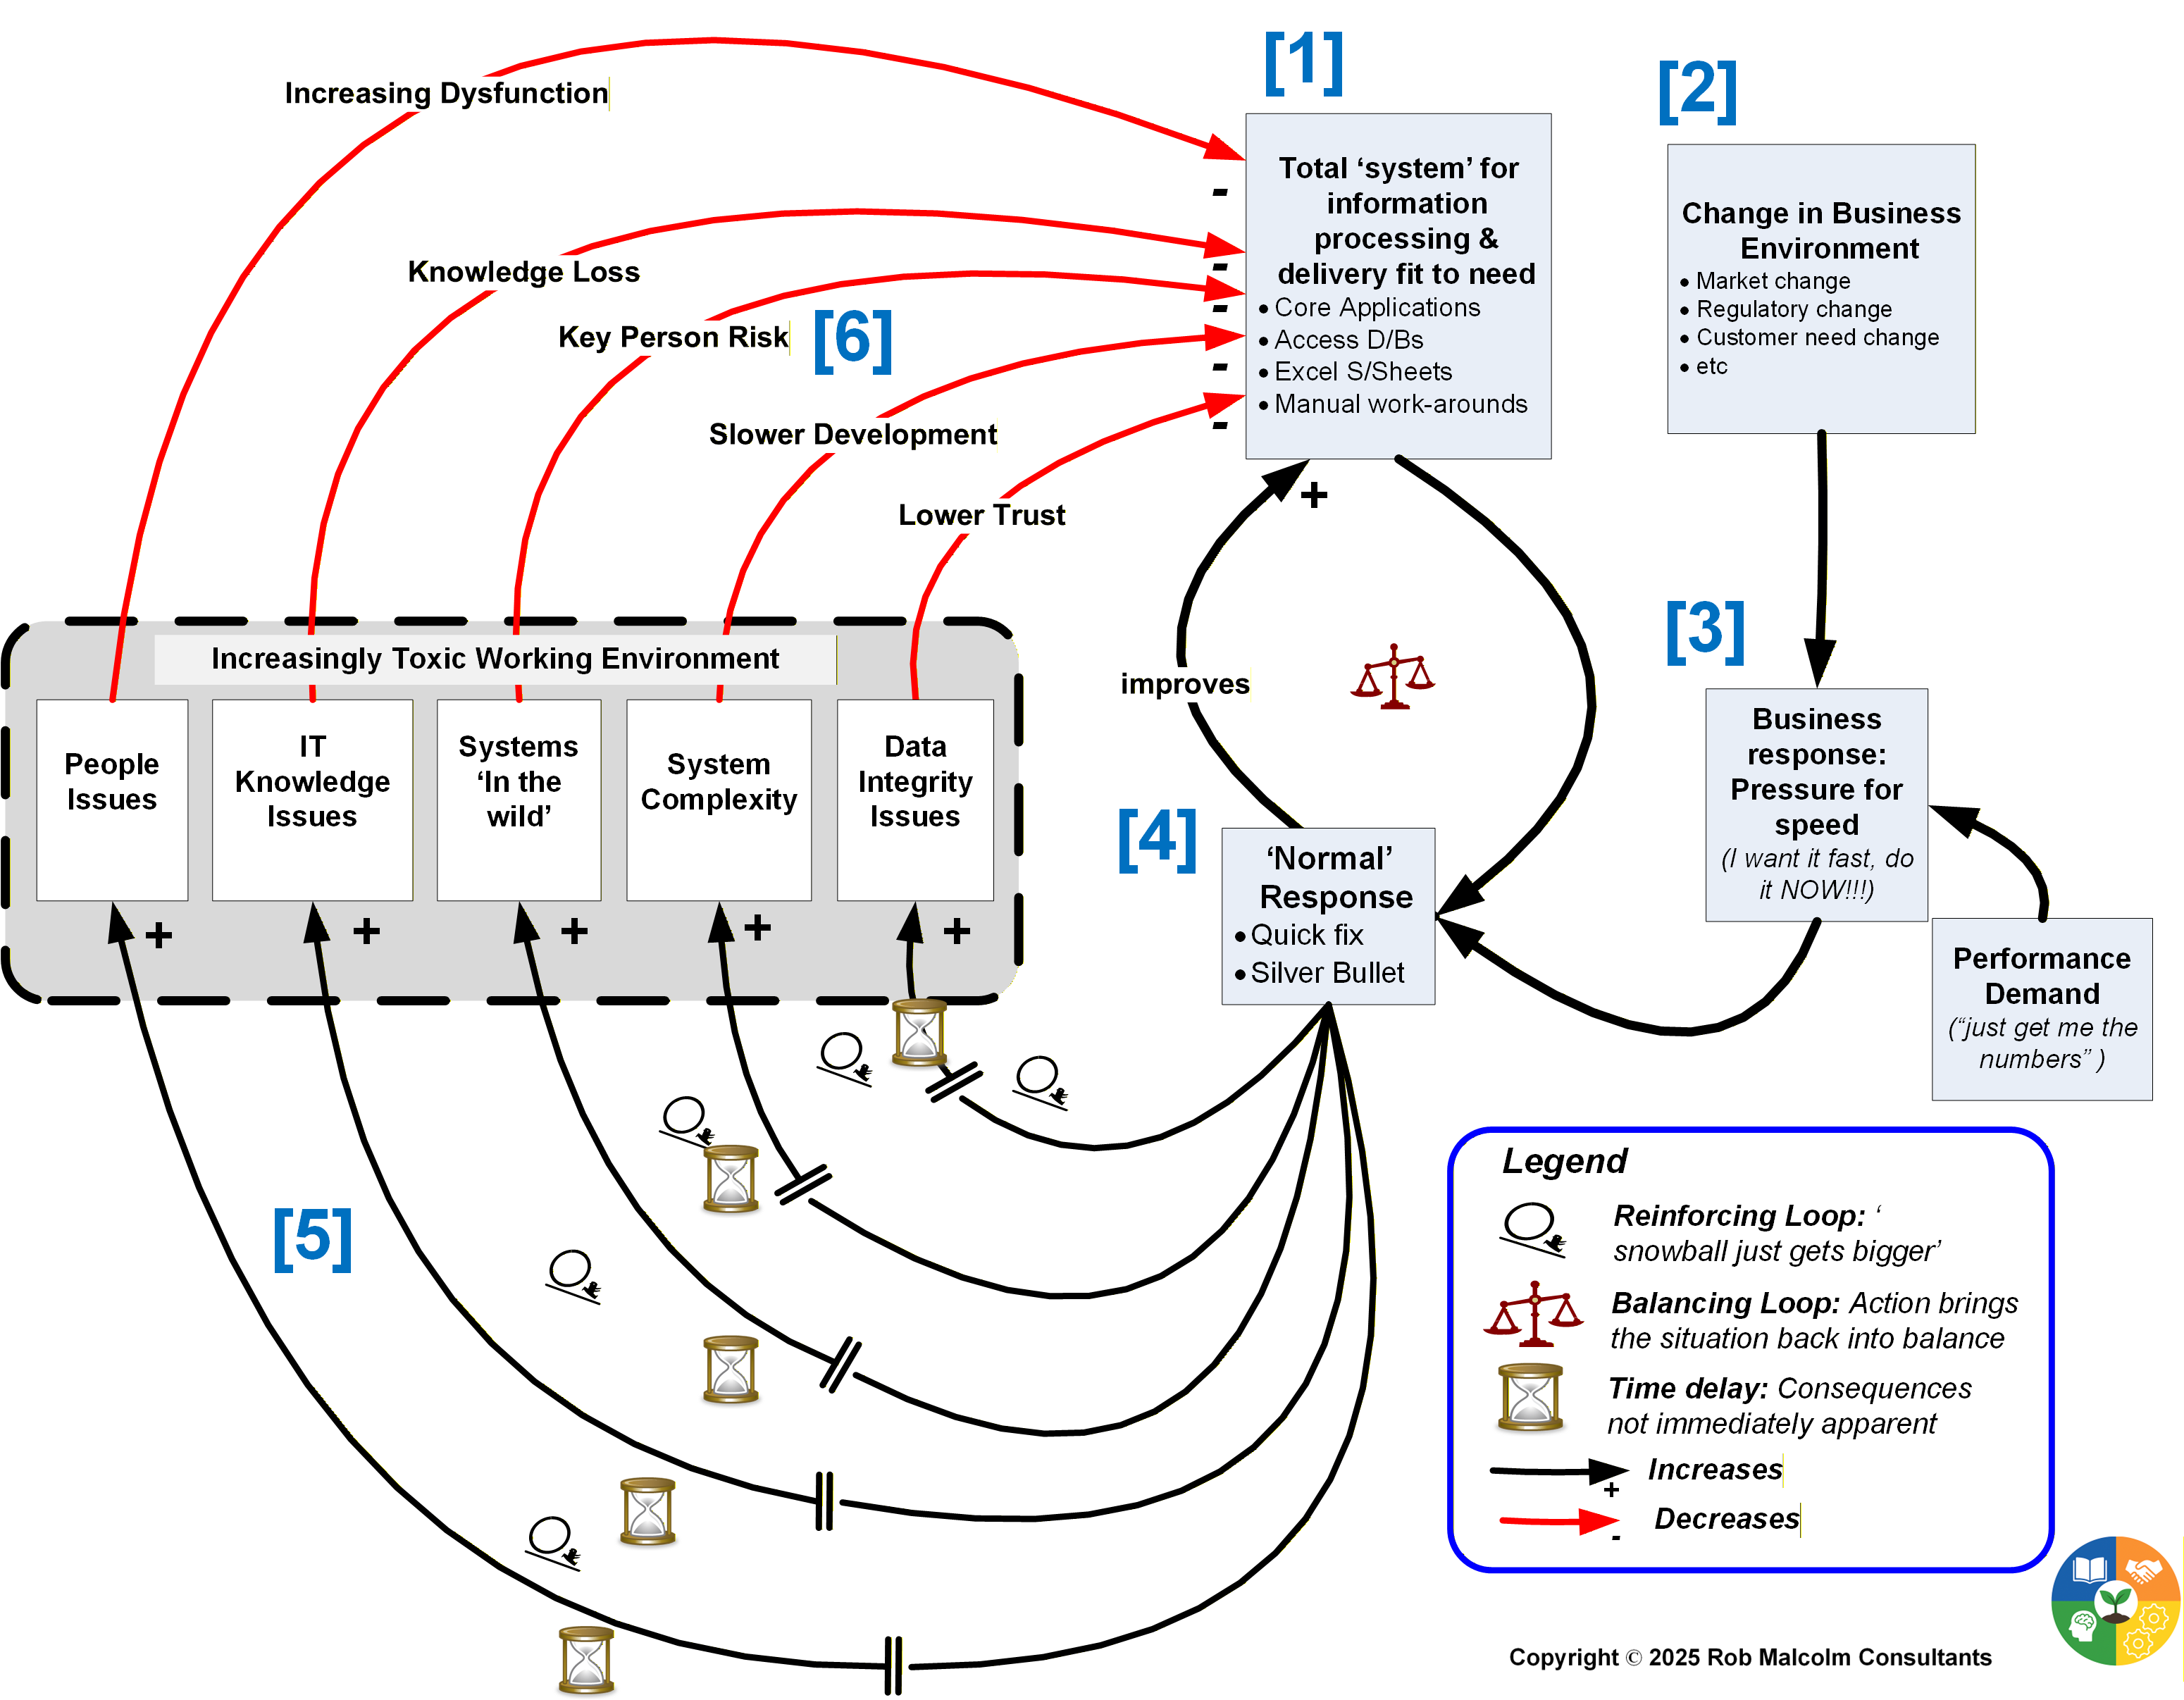
Figure 1: Quick Fixes that Fail and the ‘Normal’ Response

Figure 3: Using Adaptive Capacity elements to inform an Adaptive Response

Figure 7: Discussion Styles and Outcomes based on the work by William Isaacs

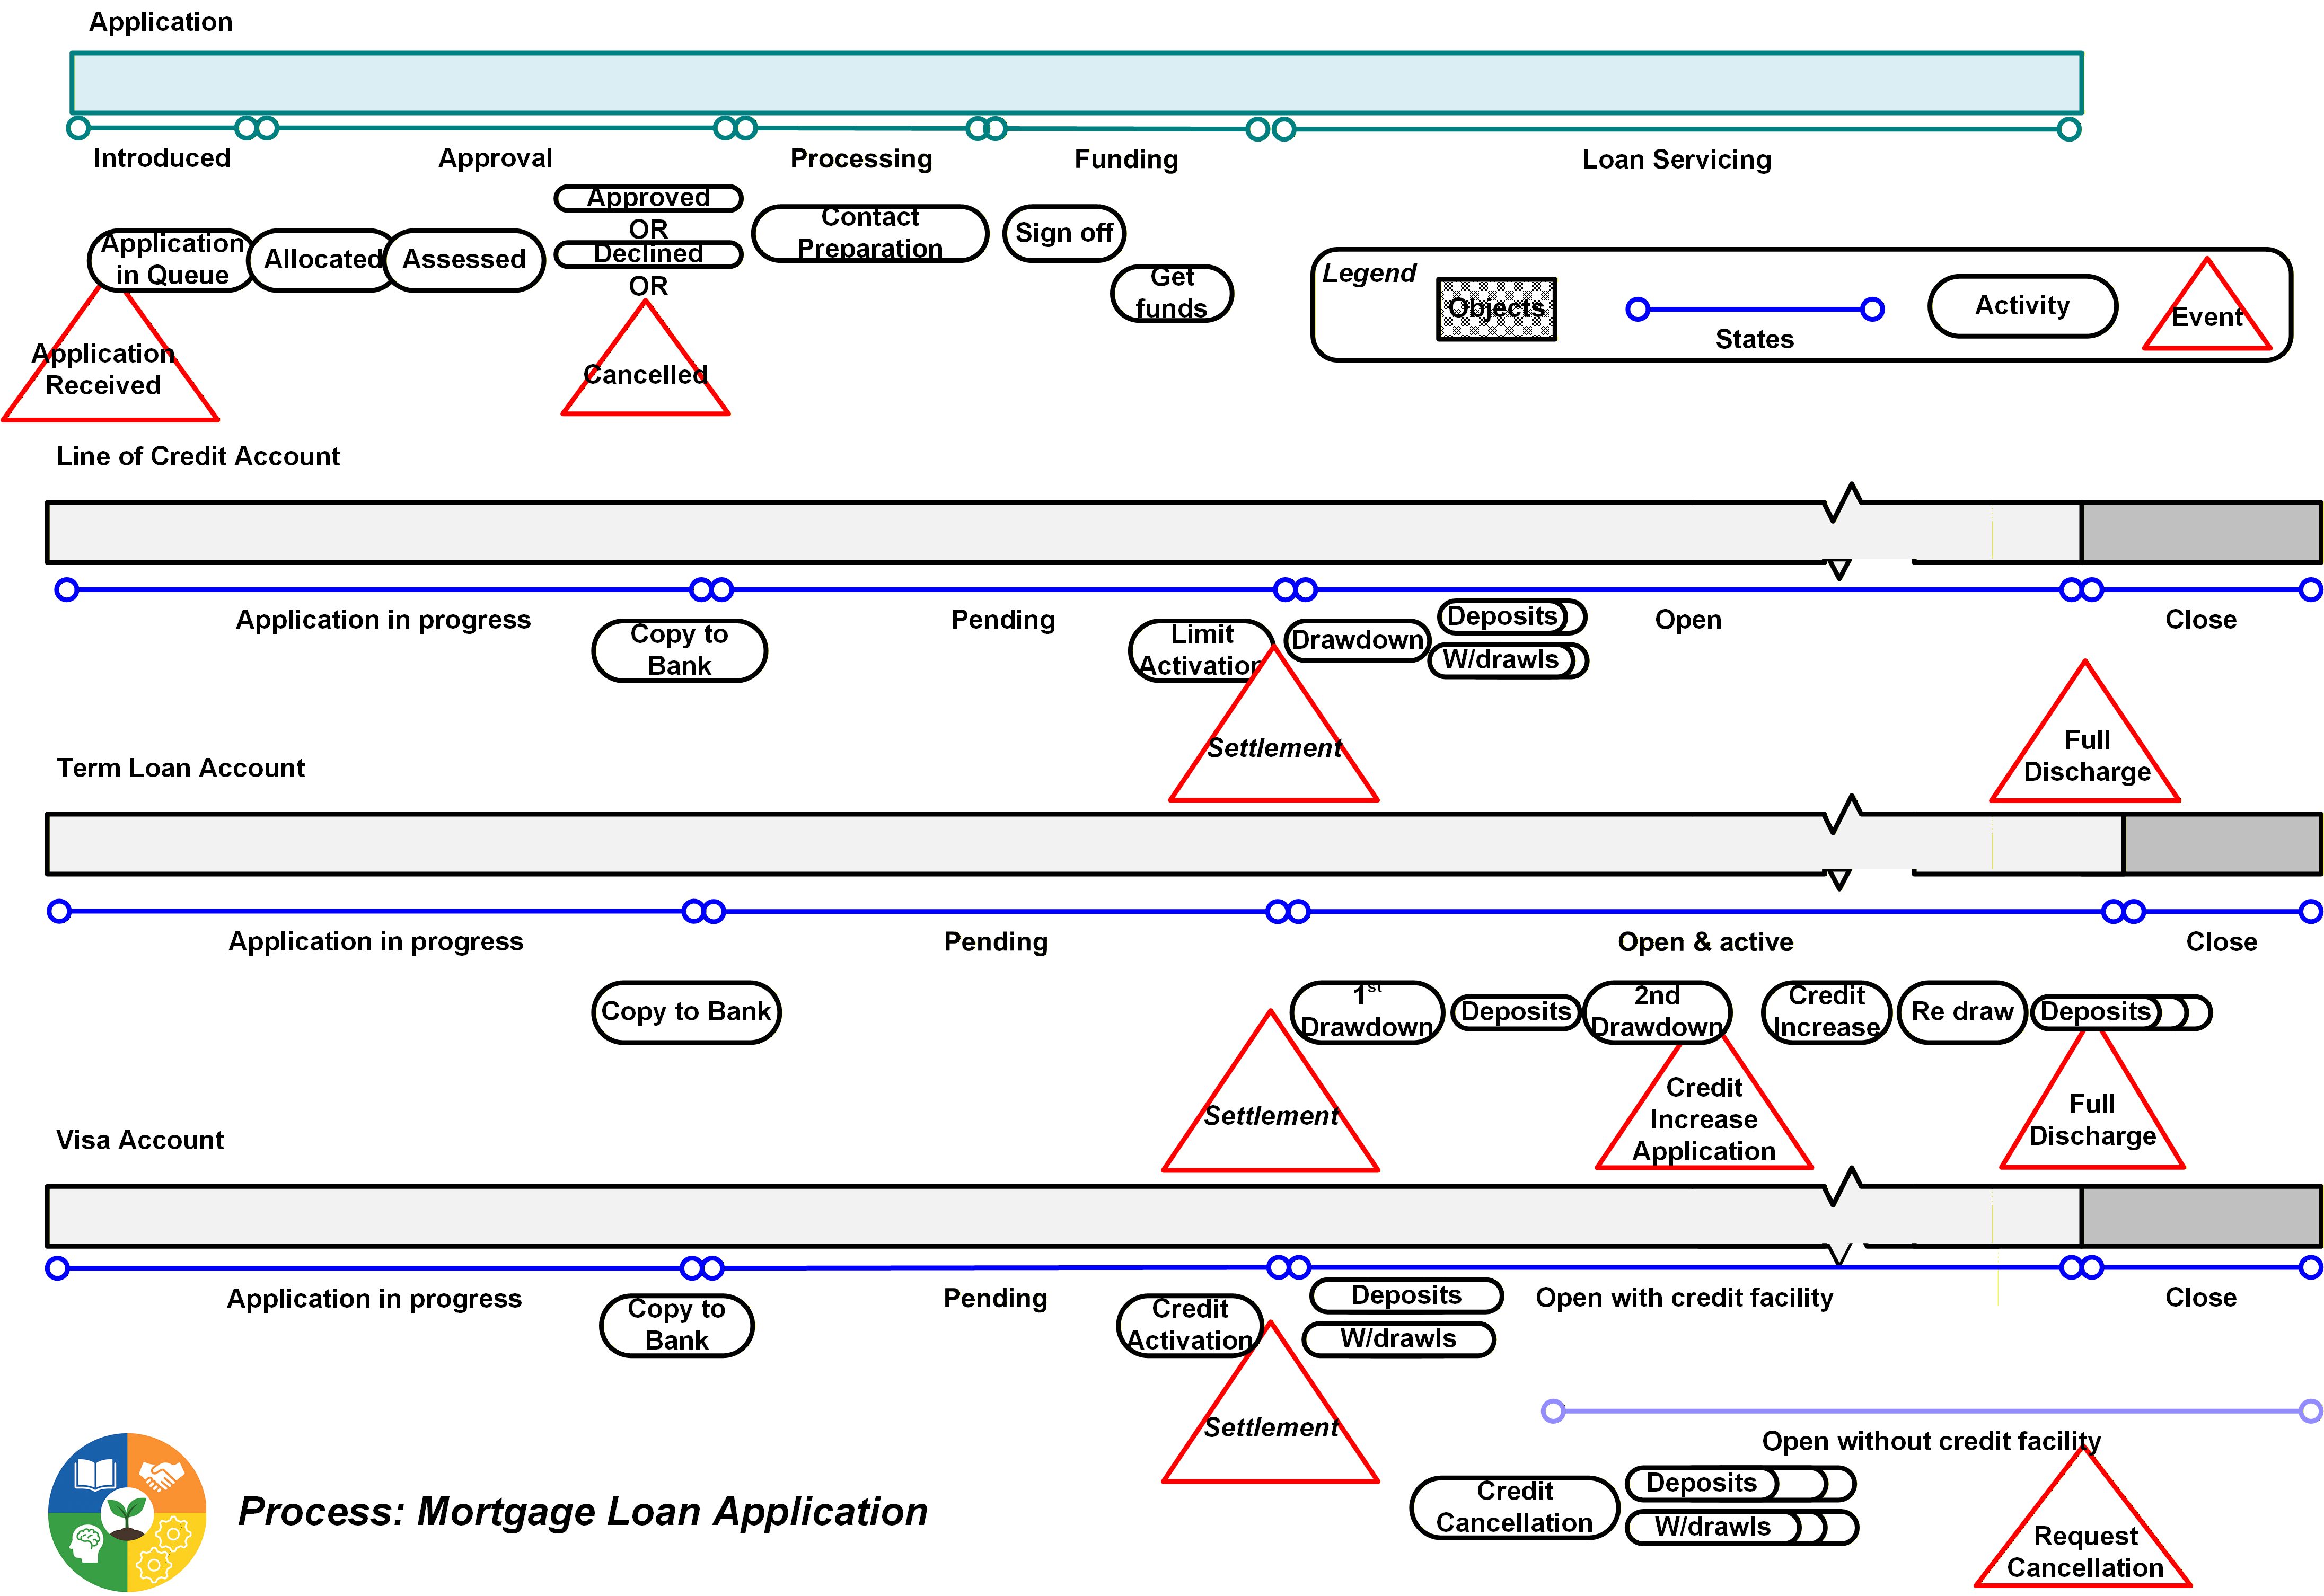
Figure 13: Example BCM

Figure 14: BCM with Investment Strategy

Figure 16: Data Risk Overlay on BCM

Figure 21: Scenario Planning Example: The options include plans for replacing the warehouse